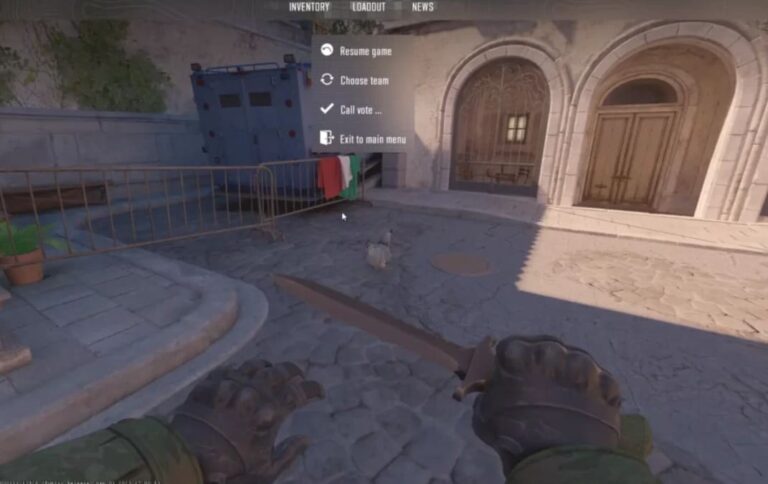
Vertigo isn’t just another Counter-Strike map. It’s a vertical battlefield that separates casual players from competitive masters.
Removed from Active Duty in January 2025, Vertigo remains one of the most strategically complex maps in CS2. And it will return.
Knowing all CS2 Vertigo callouts explained isn’t just helpful—it’s mandatory for competitive success.
Clear communication saves rounds. Hesitation costs games. This guide ensures you’re prepared when Vertigo comes back.
Let’s dive into the complete breakdown.
All CS2 Vertigo Callouts Explained
Why Vertigo Callouts Matter More Than Other Maps
Vertigo operates on two vertical levels. That changes everything.
Unlike flat maps where “site” or “mid” suffices, Vertigo demands elevation clarity. Saying “Ramp” without context creates confusion.
Your teammates need to know: Upper or Lower? Top Ramp or Bottom Mid?
This guide on all CS2 Vertigo callouts explained covers every position, rotation point, and defensive angle you need to master.
Vertigo Map Overview: Strategic Zones
| Map Section | Primary Areas | Strategic Purpose | Priority Level |
|---|---|---|---|
| Spawn Zones | CT Spawn / T Spawn | Initial positioning & setup | High |
| A Site | Ramp / Heaven / Elevator | Primary bomb site execution | Critical |
| Mid Control | Mid / Bottom Mid / Con | Map control & rotations | Critical |
| B Site | B Main / Electric / Stairs | Secondary site & retakes | Critical |
| Lower Level | Tunnels / Ladder / Underpass | Flanking & rotation routes | Medium-High |
Understanding these zones creates the foundation for effective communication during intense firefights.
Complete CS2 Vertigo Callouts Breakdown
Spawn Areas & Initial Positioning
- CT Spawn
Counter-Terrorist starting position. Direct access to A Site, Mid control, and B rotations. - T Spawn
Terrorist starting zone. Connects to Bottom Mid, T Stairs, and B Main for early aggression. - Back Door
Narrow corridor beside CT Spawn leading directly into Heaven. Quick rotation path for A Site defenders.
A Site Control Points
- Ramp
Wide sloped pathway leading to A Site. Primary entry point for Terrorist executes. High traffic zone. - Top Ramp
Final section before A Site entrance. Commonly smoked during executes. Critical choke point. - Sandbags
Defensive corner position at Top Ramp. Strong headshot angle against pushing Terrorists. - Fence
Elevated position above Top Ramp. Overlooks deeper Ramp areas. Powerful off-angle for CT holds. - Scaffolding
Yellow metal structure along Ramp’s side. Common boost spot and lurk position for both teams. - Sidehall
Narrow walkway connecting Short to Scaffolding. Alternative A Site entry point. - Short
Connector area between A Site and Elevator. Quick rotation route from Mid to A. - Elevator
Square enclosed room linking A Site, Short, and CT Mid. Central hub for upper-level rotations. - Heaven
Elevated enclosed position with sightlines to A Site and Top Ramp. Dominant defensive angle. - A Catwalk
Side pathway leading directly into Heaven from A Site. Flanking route for post-plant scenarios. - Boost (A Site)
Stacked crates providing elevated peek angle over A Site. Common utility spam target. - A Site
Primary upper-level bomb plant zone. Wide open space requiring coordinated utility usage.
Mid Control & Rotation Points
- Bottom Mid
Corridor from T Spawn leading to central Mid. Early contact zone for Mid control battles. - Mid
Central control area of the map. Dictates rotation speed and map pressure for both teams. - CT Mid
Defensive side of Mid near CT Spawn. Anchoring position for Mid control. - Boost (Mid)
Large crate used by players to peek over toward Con. Information gathering position. - Generator
Located at T Stairs top. Provides headshot angle into Bottom Mid. Common holding spot. - Top Ladder
Room connecting upper and lower map sections via ladder. Critical rotation point between levels. - Con
Elevated connector platform between CT Mid and B Site. Tight angles require utility clearing. - CT
Open area near B Site entry adjacent to Con. Transition zone from Mid to B defense. - Lift
Small visible lift area between CT and CT Spawn. Notable landmark for callouts.
B Site Defensive Positions
- B Main
Main Terrorist entry corridor to B Site. Wide approach allowing multiple entry angles. - B Stairs
Stairway leading from B Main into B Site. Vulnerable to utility spam and pre-fires. - Under Stairs
Defensive hiding spot beneath B Stairs. Close-angle position for catching rushes. - Electric
Large electrical box in B Site center. Primary cover for post-plant situations. - Triple
Three-box stack in B Site middle. Common anchor position with multiple peek angles. - Quad
Large corner box structure. Frequently used CT hiding spot during retakes. - White Box
White-colored box along B Site’s back walkway. Backsite cover position. - Wood
Wooden wall section near B Stairs. Frequently wall-banged by attacking Terrorists. - B Site
Lower-level bomb plant zone. Tighter than A Site, favoring post-plant defenders.
Lower Level Rotation Network
- T Stairs
Stairway from T Spawn ascending toward Mid control. Early game positioning route. - Toilets
Set of portable toilets near T Spawn. Landmark for orientation and calls. - Underpass
Connector corridor between B Main and Tunnels. Alternative flanking route. - Tunnels
Large open lower area with multiple branching paths. Connects Ramp, Ladder, and B approaches. - Ladder
Lower section of ladder room providing access to upper level. Rotation vulnerability point. - Bridge
Pathway from Tunnels leading to Ramp. Flanking route to A Site from lower level. - Big Box
Large cover position near Bridge with sightlines to Ramp. Lurk and save spot. - Save
Deep corner in Tunnels used for weapon preservation during lost rounds.
Master Callouts List: Quick Reference
Upper Level Positions
| Callout | Description |
|---|---|
| A Site | Upper bomb plant location |
| Heaven | Elevated A Site control point |
| Top Ramp | Final approach to A Site |
| Short | Connector near Elevator |
| Elevator | Rotational hub room |
| Fence | Elevated Ramp overlook |
| Scaffolding | Yellow metal boost structure |
Mid Control Positions
| Callout | Description |
|---|---|
| Mid | Central control zone |
| Bottom Mid | T approach corridor |
| CT Mid | Defensive Mid anchor |
| Con | Connector to B Site |
| Generator | Headshot angle position |
| Top Ladder | Level transition room |
Lower Level Positions
| Callout | Description |
|---|---|
| B Site | Lower bomb plant location |
| Electric | Central B Site cover |
| Triple | Three-box structure |
| Quad | Corner defensive position |
| B Main | Primary B entrance |
| Tunnels | Lower rotation network |
| Bridge | Path to Ramp from lower |
| Save | Economy preservation spot |
Strategic Communication Tips for Vertigo
Always Specify Elevation
Never say just “Mid” or “Ramp.” Add “Upper” or “Lower” context to prevent confusion.
Prioritize Mid Control
Mid dominance dictates rotation speed. Communicate Mid status constantly throughout rounds.
Use Clear Enemy Numbers
“Three pushing B Main” is infinitely better than “B push maybe.” Precision wins rounds.
Call Utility Usage
When enemies use grenades, call it immediately. This information shapes defensive decisions.
Preparing for Vertigo’s Return
Vertigo will rejoin Active Duty eventually. When it does, unprepared teams will struggle.
Practice These Focus Areas:
- Callout Memorization
Repetition builds instant recognition. Drill callouts in casual matches before competitive play. - Vertical Awareness Training
Consciously practice specifying upper versus lower positions in every callout you make. - Mid Control Discipline
Understand Mid’s strategic importance. Practice Mid takes and defensive setups extensively. - B Site Anchor Positioning
Lower site punishes poor positioning severely. Master defensive angles before aggressive plays.
Conclusion: Master Communication, Win More Rounds
Vertigo rewards teams with structured, precise communication systems.
Understanding all CS2 Vertigo callouts explained provides faster rotations, cleaner site executes, and improved clutch potential.
The vertical complexity that makes Vertigo challenging also makes it rewarding for prepared teams.
When the map returns, you’ll be ready. Your opponents won’t be.
Start drilling these Vertigo CS2 callouts today. Your rank will thank you tomorrow.
Also Check: